SHE HAS ISSUES
 When I found my used sailboat, I looked her over, poked around and then decided to give her a go. Back in 1981, when Catalina produced her, I had met my first wife and did pretty much the same thing with her. I married the woman, knowing little about who she was. For the first six months of the ill-fated marriage, we barely saw much of each other. She lived in High Wycombe. I lived in Devon, almost two hundred miles away. Later, in earnest, we moved in together, but sadly, fidelity did not. We both had issues. She cheated on me, and I on her. Our marriage ended in divorce.
In many relationships, familiarity either breeds contempt, or it reveals one’s capacity for love. My Catalina 25 also has issues, a multitude of small ones, which I viewed as a cluster of fun. However, when she moved home, a closer inspection revealed around twice as many issues than those observed at the storage facility/graveyard. Gradually, the reasons behind her owner’s dumping her on Craigslist materialized. Even I, at times, felt overwhelmed.
However, faulty equipment, stains, and blemishes spoiling through wood, steel and resin, the result of neglect and the lack of regular maintenance co-dependently knocked-on for thirty-odd years formed the character lines that attracted me to her. So, just as I did with my current life partner and best friend of twenty-odd years, I surrendered to tolerance of her traits going forward and loving my “new-to-me” boat.
 One example of a knock-on effect is the crack in the hull where the hull extends downward, forming the base of the keel joint. I knew what the “Catalina Smile” was, but this crack was not in the keel joint. I also discovered some damage on the forward tip of the fin and deduced that the boat must have run aground at some point. Absorbing the energy from the altercation, I imagined the rear of the keel flexing upward into the hull. The absence of a depth finder aboard the boat supported my sharp-witted theory. I added the gadget to my wish list.
For a while I left the Catalina uncovered, identifying leaks to the cabin. It was then that I noticed a phenomenal and otherwise unfathomable occurrence. Rain trickled down the outside of the hull from each side of the deck into the damaged gel coat. The winter’s freeze expanded the crack as the boat lay trailered and out in the open. The trauma manifests inside the boat, beneath the companionway, as a failed superficial joint where the floor liner attaches to the shell. While this is a substantial amount of fiber glass work, I don’t believe it’s a deal breaker. You can watch the video here.
During the last few months as I studied her condition more closely, I formed an imaginary, love-hate relationship with not only her previous owners but also the manufacturer. Some things weren’t right from the get go. I wondered if Catalina’s shoddy and haphazard workmanship plagued the original owner. If you are that person/s, the original owner/s of C-25, HIN# CTYK2620M81J, do let me know. Perhaps you have pictures or stories of great adventures. Including the history of this Catalina cruiser would certainly add value to this account.
 Overall, the most significant issue for me, I believe, was not knowing where to begin the renovation. Plagued by rain, then snow, and more bloody rain, I wondered, why did I ever leave England? Unusually, the sun here in Tennessee rarely shone during winter this year. Nor does it shine at the moment in the earliest part of spring.
Fortunately, though, a propane gas fire kept the new workshop warm, and the projects continued unhampered. I reconditioned winches, stripped varnish from the brightwork and covered the boat with a tarp. I also buffed her stanchions and chainplates and learned a lot of new skills. I look forward to sharing those soon.
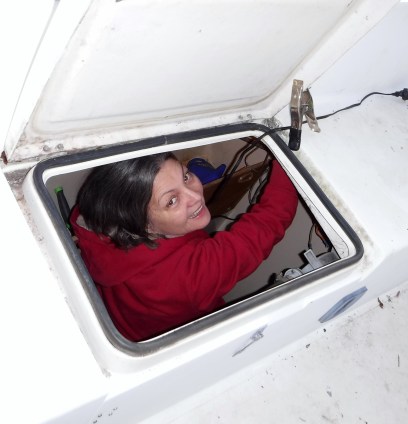
However, the most beneficial aspect of all the recent work was cleaning her inside and out. We took the advice of Andy Miller, an expert boat builder at boatworkstoday.com, who suggested taking the “least invasive approach” to restoring the original gel coat. The results surprised us all. Much of the inside came up like new once we removed the mold and a thin film of tobacco residue. Even the bilge came up nice. Although the boat still exhibits her age, scrubbing the deck and sanitizing the cabin made necessary decisions easier. Even the cushions look and feel new after we stripped off the covers and laundered them.
Next, a long list of questions arose. Here are just a few. Do I polish her up, re-spray the gel coat or roller/brush-paint both the deck and the hull? Should I leave her just as she is? Why is the outboard mounted on the starboard side of the stern? The 15′ control cables coil up in the quarter berth, creating an undesirable sleeping area. And what about the dreaded anchor locker? How do I make it watertight? Standing water within it rusted out the bolt for the bow eye, leaving a stubborn brown streak on the gel coat. To make matters worse, the fore-deck alone has three dozen holes in it, all of them letting in water.
 Finally, in the late 1990’s, I met the love of my life. The last eighteen years of happily-ever-after taught much about valuable relationships. I discovered that loving is less about what you can give to each other, and more about what you let go of.
This adage reflects in my boat renovation strategy. When I bought her, I dreamed of a bright, angelic form with immaculate sails drifting across a dazzling lake beneath a heavenly summer sky. Fortunately, I let go of that fantasy. Alas, she will never be perfect. She wasn’t that perfect in the first place, and truthfully, neither was I. We are such a good match don’t you think?
I posted more pictures of the cleaning process. It was more work than I thought. My advice to any of you having a go, be patient and meticulous. Prepare to put in some time. Cleaning the boat up provided a freshened perspective. It lightened my anticipated work load and simplified my renovation strategy. So far, the latter looks like this.
Step 1: Strip her down.
Step 2: Clean her up.
Step 3: Make her water tight again.
Just click the link, “Clean Her Up” to view my latest gallery.
If you prefer you can follow this blog on my website: www.martinjlaight.com/blog
If you prefer you can follow this blog on my website: www.martinjlaight.com/blog
In the next post, I’ll show how I dismantled and serviced the winches. Yes! I wrote the winches NOT the wenches!

Comments
Post a Comment
I want my blog to be helpful to you. if you have any questions or wish to share your experience in the field of sailboat renovation, I appreciate your insightful comments.